Hugo in Docker: Benefits and Practical Guide
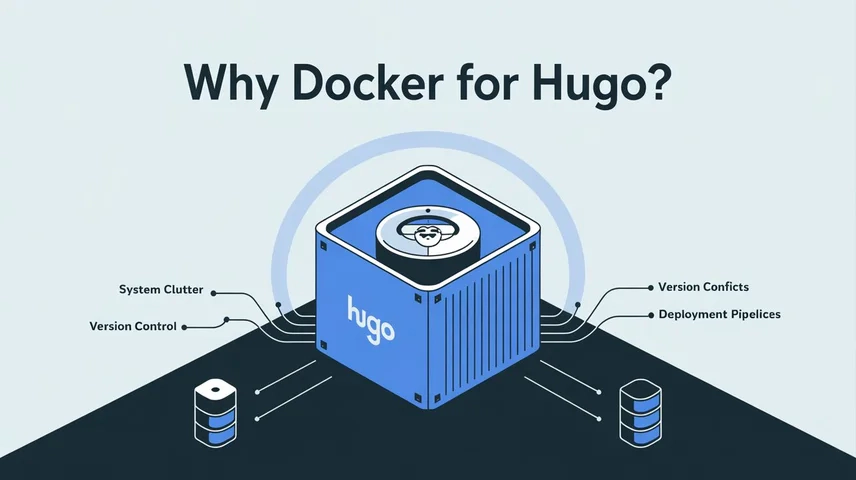
Table of contents
Why Docker for Hugo?
I used to install Hugo directly on my system. Then I switched to Docker, and honestly? I’m never going back. Here’s why:
No cluttering your system. Hugo installed bare metal means adding binaries, dependencies, and configuration to your machine. With Docker, it’s isolated. Clean.
Version switching is painless. Need a different Hugo version? Just change the image tag. No reinstalling, no conflicts with system packages. One line change.
Consistency everywhere. Local development, CI/CD, production - they all run the exact same Hugo version. No more “but it works on my laptop” surprises at 3 AM.
Lightweight. The official Hugo image is around 100MB. Compare that to installing Go and compiling Hugo from source.
Just works. Docker takes care of everything. No setup scripts, no dependency management. Pull the image, run the container.
The Official Hugo Docker Image
The official image is at ghcr.io/gohugoio/hugo:v0.152.2. One thing to watch out for though: the command syntax is a bit different:
# These won't work:
hugo new site          # Wrong
hugo server            # Wrong

# This is what you actually do:
new site               # Right
server                 # Right
--destination /target --minify  # Build command
It’s a minor quirk, but once you know it, you’re golden.
Real-World Implementation: How hmmr.online Uses Docker
I built this blog using three simple scripts. They handle everything from local development to production deployment. Let me show you how they work.
1. dev.sh – Local Development
Run a live-reload development server on port 1313:
#!/bin/bash

HUGO_IMAGE="ghcr.io/gohugoio/hugo:v0.152.2"

docker run --rm -it \
  -v $(pwd):/src \
  -w /src \
  -p 1313:1313 \
  "$HUGO_IMAGE" \
  server --bind 0.0.0.0 --buildDrafts --buildFuture
Start it with ./dev.sh, then open http://localhost:1313. Edit your markdown files and watch the site update in real-time. --buildDrafts lets you preview unpublished posts, and --buildFuture shows scheduled ones.
No installation, no fiddling with your system. Just run and write.
2. deploy.sh – Production Deployment
Build and deploy the site to production:
#!/bin/bash

HUGO_IMAGE="ghcr.io/gohugoio/hugo:v0.152.2"
LIVE_DIR="/var/www/hugo/hmmr"
LOCK_FILE="/tmp/hugo-hmmr-deploy.lock"

if [ -f "$LOCK_FILE" ]; then
  echo "Deployment already running. Exiting."
  exit 0
fi

touch "$LOCK_FILE"
trap "rm -f $LOCK_FILE" EXIT

# Build with minification
docker run --rm \
  -v $(pwd):/src \
  -v "$LIVE_DIR":/target \
  -w /src \
  "$HUGO_IMAGE" \
  --destination /target --minify
This script builds the site to /var/www/hugo/hmmr where Nginx serves it. The --minify flag compresses HTML/CSS/JS. The lock file prevents multiple builds running at once.
I call this after pushing to main - either manually with ./deploy.sh or automatically via GitHub Actions. Either way, the site is live in seconds.
3. shell.sh – Run Any Command
Run any Hugo command in the container:
#!/bin/bash

HUGO_IMAGE="ghcr.io/gohugoio/hugo:v0.152.2"
CONTAINER_NAME="hugo-shell-$(date +%s)"

docker run --rm -it \
  --name $CONTAINER_NAME \
  -v $(pwd):/src \
  -w /src \
  "$HUGO_IMAGE" \
  "$@"
Usage:
# Create a new post
./shell.sh new content/posts/my-post.md

# Check Hugo version
./shell.sh version

# Build without minification
./shell.sh --destination ./public
Centralized Configuration
All scripts reference a single configuration file:
hugo-container.conf:
HUGO_IMAGE="ghcr.io/gohugoio/hugo:v0.152.2"Change the Hugo version here, and all scripts automatically use the new version. No copy-pasting needed.
For anything else, I use a generic wrapper:
#!/bin/bash

HUGO_IMAGE="ghcr.io/gohugoio/hugo:v0.152.2"
CONTAINER_NAME="hugo-shell-$(date +%s)"

docker run --rm -it \
  --name $CONTAINER_NAME \
  -v $(pwd):/src \
  -w /src \
  "$HUGO_IMAGE" \
  "$@"
Use it like this:
./shell.sh new content/posts/my-post.md    # Create a post
./shell.sh version                          # Check Hugo version
./shell.sh --destination ./public           # Build without minify
It’s just a passthrough to Hugo. Handy for when the standard scripts don’t cover what you need.
The Workflow
In practice, here’s how I publish a new post:
# 1. Start the dev server
./dev.sh

# 2. Write in another terminal
# The site live-reloads at http://localhost:1313
# I can see my changes instantly

# 3. Commit and push
git add content/
git commit -m "Add new post"
git push origin main

# 4. Deploy (manually or via automation)
./deploy.sh
# The site is now live
That’s it. Write, commit, deploy. No build steps to babysit, no version conflicts to debug.
Why I Use This Setup
The beauty of Docker is simplicity. I don’t have Hugo installed anywhere. My entire blogging setup lives in three bash scripts and some Docker volumes. If I need to set this up on a new machine, I just:
- Clone the repo
- Install Docker
- Run
./dev.sh
That’s it. No “follow 12 installation steps”, no version conflicts, no mystery errors.
And when I deploy to production, I know for a fact that the exact same Hugo version and environment is running there as on my laptop. No surprises.
TL;DR
Use Hugo in Docker instead of installing it bare metal. You get version isolation, consistency across environments, and no system clutter. Use three simple scripts: dev.sh for development with live reload, deploy.sh for production builds, and shell.sh for custom commands. Write, commit, push - GitHub Actions or ./deploy.sh handles the rest.
Written by
Alexander Hammer
Software developer. Arch Linux. Self-hosted everything.
Popular Posts
- #1
- #2
-
#3
Why I Switched from WordPress to Hugo
508 views · Read -
#4
Ricing Hyprland with Claude Code CLI
131 views · Read -
#5
We got lost in AI
122 views · Read